Thursday, April 16, 2009

Saturday, January 10, 2009
Big Butt Head Scissors
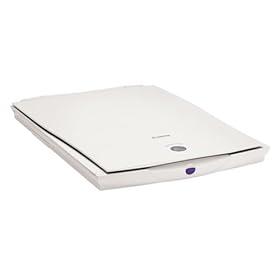
Canon N650U
Field test
* Tested:
Canon N650U
xsane
healthy
ocrad
* System:
Ubuntu 8.10 Intrepid Ibex
Linux Kernel 2.6.27-11-generic
* Hardware: Intel Pentium IV
2.00 GHz 1024 MB RAM
ATI Radeon 9800 PRO 256 MB DDR II

The old scanner that I used on previous Windows behaves very well also on Linux. This is a Canon N650U flatbed scanner that does not have any important feature (in fact it is outdated and very noisy).

But let's see how it behaves in general, this scanner and packets Xsane Sane and I suppose many other scanners have the same behavior.
connect the scanner to the USB port and open xsane. Search devices and is now found my scanner.

lined with GIMP-style windows, one for the preview, the settings one by one for the histogram: in short, everything (to make small programs for Windows).
begin to load preview (unfortunately the scanner is slow) and I find the image to crop, rotate, adjust, balance and ultimately acquire permanently.
for once no problem with hardware (on Windows I had to install a small program in French heavy that often did not work).
With The GIMP GIMP for Xsan integration exists which can capture the image directly from the scanner. Click on "File -> Open -> Xane -> Device dialog ..." and opens the classic interface of Xane.

Once you get the picture (as you normally do with Xane) it is automatically copied to GIMP is ready for editing. 
Field test
* Tested:
Canon N650U
xsane
healthy
ocrad
* System:
Ubuntu 8.10 Intrepid Ibex
Linux Kernel 2.6.27-11-generic
* Hardware: Intel Pentium IV
2.00 GHz 1024 MB RAM
ATI Radeon 9800 PRO 256 MB DDR II

The old scanner that I used on previous Windows behaves very well also on Linux. This is a Canon N650U flatbed scanner that does not have any important feature (in fact it is outdated and very noisy).
But let's see how it behaves in general, this scanner and packets Xsane Sane and I suppose many other scanners have the same behavior.
connect the scanner to the USB port and open xsane. Search devices and is now found my scanner.

lined with GIMP-style windows, one for the preview, the settings one by one for the histogram: in short, everything (to make small programs for Windows).
begin to load preview (unfortunately the scanner is slow) and I find the image to crop, rotate, adjust, balance and ultimately acquire permanently.
for once no problem with hardware (on Windows I had to install a small program in French heavy that often did not work).
With The GIMP GIMP for Xsan integration exists which can capture the image directly from the scanner. Click on "File -> Open -> Xane -> Device dialog ..." and opens the classic interface of Xane.

Once you get the picture (as you normally do with Xane) it is automatically copied to GIMP is ready for editing.
Friday, January 9, 2009
Grannys Mit Big Boobs
lxde
Review
* Tested:
lxde (metapackage) *
System: Ubuntu
8.10 Intrepid Ibex
Linux Kernel 2.6.27-11-generic
* Hardware: Intel Pentium IV 2.00 GHz
1024 MB RAM ATI Radeon 9800 PRO 256 MB DDR II

Ultra light, suitable for PC antiquated lxde is a younger brother of GNOME and KDE. Of course you ask the purpose of having another DE in addition to the three main ones?
This environment is designed to be lightweight but at the same time beautiful, obviously at the expense of customization.

installing from the Synaptic metapackage lxde find in our session-manager (usually GDM) lxde the new entry. Starting a new session in this so you will definitely surprised.
The DE starts in a few seconds presents a panel (Windows-style) and the usual icons on your Desktop. Nothing more. Nothing awn, no compiz, no plasmoids and varied. Just a Desktop.

start applications we see now the light of our system.

The metapackage installs additional applications extremely light (around a dozen are MB):
So for those who have special needs as well as being lightweight and simple, and certainly suitable for use on netbooks. 
Review
* Tested:
lxde (metapackage) *
System: Ubuntu
8.10 Intrepid Ibex
Linux Kernel 2.6.27-11-generic
* Hardware: Intel Pentium IV 2.00 GHz
1024 MB RAM ATI Radeon 9800 PRO 256 MB DDR II

Ultra light, suitable for PC antiquated lxde is a younger brother of GNOME and KDE. Of course you ask the purpose of having another DE in addition to the three main ones?
This environment is designed to be lightweight but at the same time beautiful, obviously at the expense of customization.
installing from the Synaptic metapackage lxde find in our session-manager (usually GDM) lxde the new entry. Starting a new session in this so you will definitely surprised.
The DE starts in a few seconds presents a panel (Windows-style) and the usual icons on your Desktop. Nothing more. Nothing awn, no compiz, no plasmoids and varied. Just a Desktop.

start applications we see now the light of our system.

The metapackage installs additional applications extremely light (around a dozen are MB):
- Leafpac -
- GPicView block of text - image viewer
- Xarchiver - manager of archives
- PCMan - file manager
- Xscreensaver setup
So for those who have special needs as well as being lightweight and simple, and certainly suitable for use on netbooks.
Wednesday, January 7, 2009
Pokemon Gold Sprite Sheet
Software for mathematics
jumble
* System: Ubuntu 8.10 Intrepid Ibex
GNOME 2.24.1
Linux Kernel 2.6.27-11-generic
migrating from Windows to Linux you may encounter several problems in being able to find valid substitutes for programs that were used before and that you are ideal for various reasons. Software for common tasks such as surfing the Internet, peer to peer, office, instant messaging, multimedia, usw ... there are thousands for Linux.
The problem arises when searching for viable substitutes for less common software. Among these are definitely the CAS software (computational algebra system) and software for geometric representations: some are more numerous users and / aMule compared to Maple.
So if we substitute for Maple, MuPAD, Mathematica, Cabri, GeoGebra (any of which are existing alternatives for Linux but in my opinion can be safely left out) could be useful to us a few tips on valid substitutes for these programs. From this springs from the list that I propose.
wxMaxima 0.7.1 + Maxima

is a GUI for Maxima and a good alternative to programs such as Maple or Mathematica.
allows you to perform many operations by simply selecting from the numerous menu or from the special pulstanti. It also allows the inclusion of expressions via "command line". Very easy to use and full of many features.
QtOctave + Octave + Gnuplot

The combination of GNU Octave + Plot and an alternative to mathematical systems in the style of MatLab, Octave, although it is only by a software command line interface provides QtOctave very few tools convenient to use the best combination.
kmplot

Simple but effective kmplot only serves to handle graphics. It is appreciated for its simplicity and for its light weight lends itself well to do simple plotting graphs.
For the representation of formulas MS Equation Editor replaces OpenOffice.org Math used on the Microsoft Office suite.
Links:
- http://www.linuxrsp.ru/win-lin-soft/index-italian.html
Monday, January 5, 2009
Gall Bladder Flat Stomach After Surgery
Xournal
Review
* Tested:
xournal
Wacom Bamboo
WTM-450 * System: Ubuntu 8.10 Intrepid Ibex
GNOME 2.24.1
Linux Kernel 2.6.27-11-generic
* Hardware: Intel Pentium IV 2.00 GHz
1024 MB RAM ATI Radeon 9800 PRO 256 MB DDR II
Good to know! Surfing on Synaptic here that kneels before me the package xournal . A marvel, a prodigy and a real pleasure for owners of graphics tablets.
Written with the Gtk libraries xournal lends phenomenal now, alas, good substitute of software incompatible with Ubuntu CD inserted into the Wacom. We find the program in the Synaptic repository and, once installed, in "Applications -> Accessories -> Xournal.

you ask its purpose. This little tool is a lightweight package that lets you take notes in style notebook with tablets. Does the rubber and allows the buttons with the stylus , switch modes, from rubber to highlighter pen. It also has the ability to insert text and more importantly try to roconoscere geometric shapes (triangles, circles ,...). All this comes in various colors.
allows to take notes on the lines that simulate paper or notepad (wonder) to make annotations on the PDF.

allows to save the annotations and changes to PDF very effectively. Course also allows the printing of documents.
short, simple, fast, light, practical and safe.
Links:
- http://en.wikipedia.org/wiki/Xournal
- http://xournal.sourceforge.net/
Sunday, January 4, 2009
Secrets To Building A Balsa Wood Bridge
HP Photosmart C4599
Field test
* Tested: HP Photosmart C4599
HP Linux Imaging and Printing (hplip)
hpijs
hpoj
* System: Ubuntu 8.10 Intrepid Ibex
GNOME 2.24.1
Linux Kernel 2.6.27-11-generic
* Hardware: Intel Pentium
IV 2.00 GHz
1024 MB RAM ATI Radeon 9800 PRO 256 MB DDR II *
Network:
1 x Siemens Gigaset SX541 WLAN dsl
1 x Windows XP PC (Wired)
1 x PC with Ubuntu 8.10 (Wired or Wireless)
x 2 Mac OS X (Wireless)
1 x HP Photosmart C4599 Printer (Wireless)
 the usual. A beautiful jet printer ink HP compatible with Mac OS X (for which there is even a widget) and Windows puts up a fuss when ported to Linux.
In this case the printer you see "System -> Administration -> Printing. Now we just have to click on "New" and select it.
begin problems. What driver to use? There are drivers for the C4300 series and C4400 series but our no. This road is closed.
WARNING: I say first of all you have to make at least installation on Mac OS or Windows because the printer must be configured for your network!
NOTE: These procedures describe the actions to be taken to an HP Photosmart C4599 connected via wireless network, other configurations may be different .
 course, HP is close all'opensource. Here then is the online repository to Synaptic and a beautiful hplip package called that provides better support for HP printers. Unfortunately
on the official website of the package is written clearly that the printer does not work over the network. We make an attempt anyway.
Once installed it appears in the menu "System -> Preferences" item "HPLIP Toolbox". Perfect.
If you have other HP printers installed a window will appear with the words "No installed HP devices found" and the command "Print Setup ...".
A window in which to choose the type of connection, in this case network.
further window will appear titled "Select from devices detected" but no device is detected. At this point we need to find the IP of the printer. To do this you can choose the "network analysis" on the display of the printer: it will print a sheet with (among other data) to be their IP.
 Click on "Find Manually" and enter the IP (in my case 192.168.2.105) and it magically appears.
a third window that appears choose the driver, of course there is the one you want (there are C4400 and C5500), then choose the first. After the procedure, and our printer magically appear in the list of printers.
Does it work? Just try it, print a marvel.
And the scanner? Well have to wait for that, be content to print. Maybe it works via USB.
Ratings:
Compatibility: 5 / 10 (driver not corrected, are unofficial packages and the scanner does not work)
Ease of Installation: 7 / 10 (takes several adventures)
Print: 8 / 10 (fast , quiet and good quality)
Links:

Field test
* Tested: HP Photosmart C4599
HP Linux Imaging and Printing (hplip)
hpijs
hpoj
* System: Ubuntu 8.10 Intrepid Ibex
GNOME 2.24.1
Linux Kernel 2.6.27-11-generic
* Hardware: Intel Pentium
IV 2.00 GHz
1024 MB RAM ATI Radeon 9800 PRO 256 MB DDR II *
Network:
1 x Siemens Gigaset SX541 WLAN dsl
1 x Windows XP PC (Wired)
1 x PC with Ubuntu 8.10 (Wired or Wireless)
x 2 Mac OS X (Wireless)
1 x HP Photosmart C4599 Printer (Wireless)
In this case the printer you see "System -> Administration -> Printing. Now we just have to click on "New" and select it.
begin problems. What driver to use? There are drivers for the C4300 series and C4400 series but our no. This road is closed.
WARNING: I say first of all you have to make at least installation on Mac OS or Windows because the printer must be configured for your network!
NOTE: These procedures describe the actions to be taken to an HP Photosmart C4599 connected via wireless network, other configurations may be different .
 course, HP is close all'opensource. Here then is the online repository to Synaptic and a beautiful hplip package called that provides better support for HP printers. Unfortunately
 on the official website of the package is written clearly that the printer does not work over the network. We make an attempt anyway.
Once installed it appears in the menu "System -> Preferences" item "HPLIP Toolbox". Perfect.
If you have other HP printers installed a window will appear with the words "No installed HP devices found" and the command "Print Setup ...".
A window in which to choose the type of connection, in this case network.
further window will appear titled "Select from devices detected" but no device is detected. At this point we need to find the IP of the printer. To do this you can choose the "network analysis" on the display of the printer: it will print a sheet with (among other data) to be their IP.
 Click on "Find Manually" and enter the IP (in my case 192.168.2.105) and it magically appears.
 a third window that appears choose the driver, of course there is the one you want (there are C4400 and C5500), then choose the first. After the procedure, and our printer magically appear in the list of printers.
Does it work? Just try it, print a marvel.
And the scanner? Well have to wait for that, be content to print. Maybe it works via USB.
Ratings:
Compatibility: 5 / 10 (driver not corrected, are unofficial packages and the scanner does not work)
Ease of Installation: 7 / 10 (takes several adventures)
Print: 8 / 10 (fast , quiet and good quality)
Links:
- http://hplipopensource.com/
- http://www.hp.com/ Product #
Mens Traditional Irish Clothes, Images
Managers photo: F-Spot and digiKam
Comparison
* Compared :
digiKam 0.9.4 (KDE), GNOME 2.24.1
F-Spot 0.5.0.3 (GNOME) GNOME 2.24.1
* System: Ubuntu 8.10 Intrepid Ibex
GNOME 2.24.1
Linux Kernel 2.6.27-11-generic
* Hardware: Intel Pentium IV 2.00 GHz
1024 MB RAM ATI Radeon 9800 PRO 256 MB DDR II
To many users need to organize your pictures has become a sore point, especially when they became available on the market new digital cameras. To organize photos in folders is not easy and this is often used photographs to a manager.

 MAC OS on such a convenient way iPhoto organizes excellent photos allow editing (forgive the Anglican) and the management through events. Yes there are a number impresionante windows of which my favorite is definitely Google's Picasa. And Linux?
Ubuntu installed by default F-Spot, which has never given me great emotions. DigiKam KDE provides a very convenient little program.
Performance:
 F-Spot was already present in Ubuntu and Pert we simply have to start it. On the test PC imports the photos (large) with a haunting slow but once imported quickly preview shows when they are recalled.
 Digikam uses the Qt libraries: the installation will require a number of KDE components that go to limit available space on your hard drive. Import photos quickly, but unlike F-Spot takes a few seconds to load preview once recalled.
Amenities:
F-Spot has a handy timeline that orders photos. Management by labels and rolls of film in my opinion, greatly complicates the program. In digiKam
are management by album, view in the form of a calendar and in the form of a timeline. All in all, find the photo you want is very simple. We can also assign tags to the various photographs.
Both programs support the evaluation of the photographs. In addition digiKam collects the details of photographs and is better in the management of removable devices.
Ratings:
F-Spot - 7
digiKam - 9
Links:

Comparison
* Compared :
digiKam 0.9.4 (KDE), GNOME 2.24.1
F-Spot 0.5.0.3 (GNOME) GNOME 2.24.1
* System: Ubuntu 8.10 Intrepid Ibex
GNOME 2.24.1
Linux Kernel 2.6.27-11-generic
* Hardware: Intel Pentium IV 2.00 GHz
1024 MB RAM ATI Radeon 9800 PRO 256 MB DDR II
To many users need to organize your pictures has become a sore point, especially when they became available on the market new digital cameras. To organize photos in folders is not easy and this is often used photographs to a manager.
 MAC OS on such a convenient way iPhoto organizes excellent photos allow editing (forgive the Anglican) and the management through events. Yes there are a number impresionante windows of which my favorite is definitely Google's Picasa. And Linux?
 Ubuntu installed by default F-Spot, which has never given me great emotions. DigiKam KDE provides a very convenient little program.
Performance:
 F-Spot was already present in Ubuntu and Pert we simply have to start it. On the test PC imports the photos (large) with a haunting slow but once imported quickly preview shows when they are recalled.
  Digikam uses the Qt libraries: the installation will require a number of KDE components that go to limit available space on your hard drive. Import photos quickly, but unlike F-Spot takes a few seconds to load preview once recalled.
 Amenities:
F-Spot has a handy timeline that orders photos. Management by labels and rolls of film in my opinion, greatly complicates the program. In digiKam
are management by album, view in the form of a calendar and in the form of a timeline. All in all, find the photo you want is very simple. We can also assign tags to the various photographs.
Both programs support the evaluation of the photographs. In addition digiKam collects the details of photographs and is better in the management of removable devices.
Ratings:
F-Spot - 7
digiKam - 9
Links:
- http://wiki.ubuntu-it.org/Grafica/F-Spot?highlight = (f-spot)
- http://f-spot.org/Main_Page
What Is A Cool Skateboard Motto
Wacom Bamboo MTE-450
Field test
* Tested:
Wacom Bamboo MTE-450
wacom-tools
xsession-xorg-input-wacom
* System: Ubuntu 8.10 Intrepid Ibex
GNOME 2.24.1
Linux Kernel 2.6.27-11-generic
* Hardware: Intel Pentium IV 2.00 GHz
1024 MB RAM ATI Radeon 9800 PRO 256 MB DDR II
bought a beautiful graphics tablet from Wacom Bamboo series here is that it applies to the Intrepid is a sudden negative result: the only aspect of the tablet seems to work is that the pointer. Here the usual accessory for PCs running on Windows and on Linux and Mac OS puts up a fuss. But there is no solution to everything.
 The tablet has the following characteristics:
 WARNING: The tutorial is designed for Wacom Bamboo MTE-450 on Ubuntu 8.10, other versions may require alternative configurations!
We loved the open terminal and install two packages:
Now change the "xorg.conf" ( in / etc/X11 / ) by adding the following lines to the end of the file (you need to open it with administrator privileges " sudo nautilus" or " sudo gedit / etc/X11/xorg.conf): Section
Save, and then log out (if Favorite Ctrl + Alt + Backspace ) and riloggatevi.
Type in terminal:
xidump stylus -> move the stylus on the tablet, the numbers should be modified ( press Ctrl + C to exit ).
xidump eraser -> move the stylus upside down (rubber) on the tablet, the numbers should be modified ( press Ctrl + C to exit ).
xidump pad -> press the buttons on the pad and turn the wheel with your fingers, the numbers should be modified ( press Ctrl + C to exit ).
Each time you will get something like this:
 If the tablet reacts to the three commands, it is set up and ready to operate. At this point you only need to associate the correct action buttons by comanto xsetwacom .
To define the button bindings syntax is this:
We create an empty file in which we can insert the following lines:
go to "System -> Preferences -> Sessions" and then "add" Mome
: Wacom
Command:
At this point the pad and ready to operate.
links:

Field test
* Tested:
Wacom Bamboo MTE-450
wacom-tools
xsession-xorg-input-wacom
* System: Ubuntu 8.10 Intrepid Ibex
GNOME 2.24.1
Linux Kernel 2.6.27-11-generic
* Hardware: Intel Pentium IV 2.00 GHz
1024 MB RAM ATI Radeon 9800 PRO 256 MB DDR II
bought a beautiful graphics tablet from Wacom Bamboo series here is that it applies to the Intrepid is a sudden negative result: the only aspect of the tablet seems to work is that the pointer. Here the usual accessory for PCs running on Windows and on Linux and Mac OS puts up a fuss. But there is no solution to everything.
 The tablet has the following characteristics:
 - a stylus with a pen (tip), rubber (rear) and two buttons;
- a widescreen pad with 4 buttons (<, >, FN1, FN2);
- a pen holder.
 WARNING: The tutorial is designed for Wacom Bamboo MTE-450 on Ubuntu 8.10, other versions may require alternative configurations!
 We loved the open terminal and install two packages:
sudo apt-get install wacom-tools xserver-xorg-input-wacomCAUTION: Always make a backup copy of important files that change!
Now change the "xorg.conf" ( in / etc/X11 / ) by adding the following lines to the end of the file (you need to open it with administrator privileges " sudo nautilus" or " sudo gedit / etc/X11/xorg.conf): Section
"InputDevice"Then look in the file section Section "ServerLayout" and add :
Driver "wacom"
Identifier "stylus"
Option "Device" "/dev/input/wacom"
Option "Type" "stylus"
Option "USB" "on"
EndSection
Section "InputDevice"
Driver "wacom"
Identifier "eraser"
Option "Device" "/dev/input/wacom"
Option "Type" "eraser"
Option "USB" "on"
EndSection Section "InputDevice"
Driver "wacom"
Identifier "cursor"
Option "Device" "/ dev / input / wacom"
Option "Type" "pad"
Option "USB" "on" EndSection
InputDevice "stylus" "SendCoreEvents"look like this:
InputDevice "eraser" "SendCoreEvents"
InputDevice "pad" should
Section "ServerLayout"Hopefully you find my here as a comparison.
Identifier "Default Layout" Screen 0
"Default Screen" 0 0
InputDevice "Configured Mouse" "CorePointer"
InputDevice "Generic Keyboard" " CoreKeyboard "
InputDevice" stylus "" SendCoreEvents "
InputDevice" eraser "" SendCoreEvents "
InputDevice" pad "EndSection
Save, and then log out (if Favorite Ctrl + Alt + Backspace ) and riloggatevi.
Type in terminal:
xidump stylus -> move the stylus on the tablet, the numbers should be modified ( press Ctrl + C to exit ).
xidump eraser -> move the stylus upside down (rubber) on the tablet, the numbers should be modified ( press Ctrl + C to exit ).
xidump pad -> press the buttons on the pad and turn the wheel with your fingers, the numbers should be modified ( press Ctrl + C to exit ).
Each time you will get something like this:
 If the tablet reacts to the three commands, it is set up and ready to operate. At this point you only need to associate the correct action buttons by comanto xsetwacom .
 To define the button bindings syntax is this:
xsetwacom September[dev] [in] [out]
-
[dev] is between a stylus (pen ) eraser (rubber) or pad (hand).
- [in] is the action of
[sc]: for example, "button1" is the 1st button while "AbsWUp" represents the motion time wheel.
-
[out] the key or button that will be used when we use the data [in]: for example, "core key ctrl x" simulates the command "Ctrl + x".
We create an empty file in which we can insert the following lines:
xsetwacom September pad button2 "core key NumpadPlus # FN1We save the home formats. "Sh" Right click on the file select "Permissions" and check the box "Allow executing file as program ".
xsetwacom September pad button4" core key NumpadMinus # FN2
xsetwacom September pad button1 "core key ctrl NumpadMinus # <>
xsetwacom September pad AbsWUp" 4 " # RotellaSu
xsetwacom September pad AbsWDn "5" # RotellaGiu
go to "System -> Preferences -> Sessions" and then "add" Mome
: Wacom
Command:
At this point the pad and ready to operate.
links:
-
http://linuxwacom.sourceforge.net
-
http://wiki.ubuntu-it.org/Hardware/Periferiche/WacomBambooFun?highlight = (wacom)
Subscribe to:
Posts (Atom)